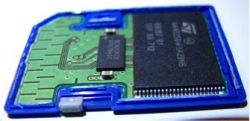
Here’s our guide to formatting SD cards on you Windows and Mac computers, as well as formatting MicroSD cards on Android devices. Please be aware that formatting an SD card will erase all of the data you have stored on it, so make sure you have backed up all of your files before going ahead!
Windows
Inserting the card
Firstly, you’ll need to connect your SD card to your computer. You can do this one of two ways – depending on whether your computer has an SD card port or not. If it does, simply insert the card. Please note that if it’s a MicroSD you’re looking to format you’ll need an adapter to fit it into a standard SD card port. If you don’t have an SD card port on your computer, you can use SD card reader which usually works via USB.
If you don’t happen to have one of these at home, you can place your SD card into a portable device such as a cell phone or digital camera, plug this into your computer via USB, and use it as a make-shift card reader.
Finding your SD Card
You can do this on Windows 10 by going to Start > File Explorer > This PC.
On Windows 8 it can be accessed by typing ‘computer’ into your system search bar and clicking the Computer icon in the Apps results.
Then locate the SD card under ‘Devices and Drives’.
Formatting
Left click the SD card, and choose ‘Format’ from the dropdown menu.
When the dialog box opens, concentrate on the box which says ‘File System’. From the dropdown menu that appears when you click this box, choose the FAT32 option. FAT32 allows the card to be read by many devices, including cell phones, cameras, and printers.
When you’ve selected this option, simply click ‘Start’ and the computer will do the hard work!
Mac OS X
Inserting the card
Connect the SD card via the SD card port on your computer, or using a USB card reader.
Finding your SD Card
Finding the SD card on your Mac is straightforward. Find the Disk Utility program in the Utilities folder in Applications, and then select the SD card from the list of drives.
Formatting
You will now need to erase the SD card data. Select the ‘Erase’ tab in the window after selecting your SD card. Then select FAT32 from the Volume Format dropdown menu. You will need to enter a name for the SD card in the ‘Name’ field. Simply click Erase… when you are ready to format.
Android
Inserting the card
Typically, MicroSD ports are located behind the cell phone’s battery. So inserting the card means opening the back panel of your phone and removing the battery. Once you’ve removed the battery, the MicroSD should slide easily into the port – try not to force it!
Finding your MicroSD card
Once your card is fully inserted into the device, open the Settings by tapping the Menu button from the Home screen, or by going into the App Drawer and selecting Settings. Select Storage from the Settings menu, under the Device heading.
You will then need to ‘unmount’ the SD card. Simply do this by tapping the ‘Unmount SD card’ option.
Formatting
The final step is to go into the Storage submenu, scrolling down until you find the SD card section. Then tap ‘Format SD Card’ to get the process started, you will be asked to confirm and insert your pin if the card is locked. Once you do this, the device will format your card.


